Succulent, Appetizing, Flavorsome ...
Beef Recipes
A Work-in-Progress - A great Collection of Recipes you do not want to miss out on is being loaded!
Feel free to send your unique recipe and help us create a library of unique recipes and diverse cooking methods.

Food may be essential as fuel to the body, but good food is fuel for the soul - Malcolm Forbes

Mint and pink peppercorn rump steak
Try this for something different!
Ingredients
8 angus rump steaks
50 ml PnP olive oil
1 handful PnP mint, chopped
1 tsp pink peppercorns
1 pinch PnP salt
1 tsp Dijon mustard
150 grams PnP butter
Instructions
Mix the chopped mint and crushed peppercorn with the olive oil,
mustard and salt.
Rub the meat with the marinade and place in the fridge for at
least 5 hours.
Remove meat from the fridge 30 minutes before cooking and
allow to reach room temperature.
Braai to your liking over very hot coals.
Once cooked, remove from braai and add a knob of butter to
each steak and allow to melt over the meat.


This recipe for Boerewors Submarines is a great braai snack for a party.
Ingredients
- 2 kg best quality boerewors
- Sosatie sticks
- 1 cup (250 ml) Barbeque Marinade
- 3 long French loaves
- olive oil
- 2 butter lettuce, washed and broken into smaller pieces
- 6-8 very ripe red tomatoes, sliced
- Green Onion Seasoning
- 3-4 onions, sliced into rings
- 1 x 200 ml Steak & Burger Sauce
Instructions
Cut the wors into 15 cm lengths and push an oiled sosatie stick through each piece. Cut through the skin of the sausage along the length with a pair of kitchen scissors and remove the skin. This helps the marinade to penetrate better.
Pour some of the Barbeque Marinade into a flat platter and roll the skewered sausages in the marinade to coat the meat. Pile coated sausages on a clean plate. Cover and leave in the fridge until ready to braai. Can be overnight or even just an hour.
Braai over hot coals, turn and baste with fresh Marinade at regular intervals. The sausages will cook much faster without the skin, therefore be careful not to overcook and dry them out.
Towards the end of the cooking time, put the whole unsliced French loaves on the braai and toast the outside.
Remove loaves from the braai and slice lengthways, but not right through.
Remove some of the soft interior of the bread and drizzle the inside with olive oil.
Line the bread with green leaves and sliced tomatoes seasoned with Green Onion Seasoning.
Slash the sausages along the length and lift out the sosatie sticks. Lay the sausage along the length of the bread.
Add onion rings.
Snip the corner of the Steak & Burger Sauce and squeeze generously over the filling.
Cut into 5-10 cm lengths for serving.
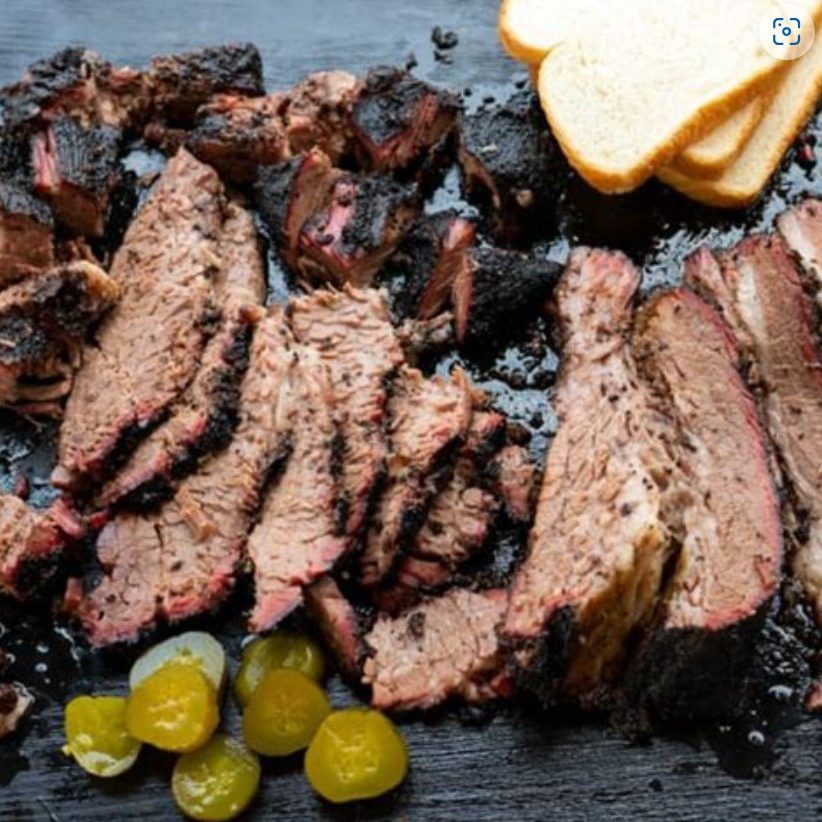
SMOKED BRISKET INGREDIENTS
- Brisket: As explained above, select the best grade of brisket that fits your budget. I’ll talk about size below.
- Beef Broth: This will be used as an injection to add both moisture and extra beefy flavor. You can use beef broth or beef consume. Consume is a little richer.
- Brisket Rub: The Texas standard is kosher salt and pepper. Feel free to stick with that, or try any pre-made beef rub, including my award-winning brisket rub from Spiceology.
- Apple Cider Vinegar: This will be spritzed on the brisket throughout the cook to add moisture and help build bark.
Substitutions: You can substitute the apple cider vinegar with water, beer or cola. I prefer the vinegar, because the tartness balances well with the fatty beef.
INSTRUCTIONS
-
Trim: Trim excess fat from the brisket.
-
Inject + Rub: Inject the brisket with beef broth. Rub it liberally with brisket rub. Cover and refrigerate overnight.
-
Heat Smoker: Set the smoker to 225F degrees with your favorite charcoal, wood chunks or pellets.
-
Smoke: Smoke fat side down, spritzing with apple cider vinegar every two hours, until a thermometer placed in the flat end of the meat measures 160-165F degrees. Make sure the smoker maintains a steady temp.
-
Wrap: Spritz the brisket one more time, and tightly wrap it in two layers of foil.
-
Finish Cooking: Continue smoking until the brisket is around 203F degrees.
-
Rest: Wrap in another piece of foil and a towel and place it in a cooler (without ice) for at least 3 hours.
-
Slice: Slice the brisket against the grain and serve.
To make burnt ends, after the resting stage, slice the point into one-inch cubes. Place them in a pan with a light sprinkle of rub and enough sauce to provide a light coat. Place the pan on a 275F-degree smoker and smoke for one hour.
NUTRITION
Calories: 652kcalCarbohydrates: 1gProtein: 87gFat: 31gSaturated Fat: 11gPolyunsaturated Fat: 1gMonounsaturated Fat: 14gCholesterol: 258mgSodium: 404mgPotassium: 1398mgFiber: 0.2gSugar: 0.1gVitamin A: 51IUVitamin C: 0.2mgCalcium: 42mgIron: 9mg
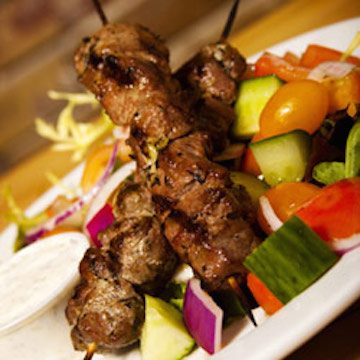
Ingredients
- 15ml sunflower oil
- 2 large red onions, sliced
- 100ml beef stock
- 50ml Worcestershire sauce
- 125ml sweet chili sauce
- 80ml tomato sauce
- 500g rump steak, cubed
Instructions
Heat the oil in a saucepan and fry the onions until soft.
Stir in the beef stock, Worcestershire sauce, sweet chili sauce and tomato sauce.
Simmer for five minutes. Remove from heat, season to taste and set aside to cool.
Thread the steak cubes onto skewers and place them in a greased roasting pan.
Pour the sauce over the kebabs and bake, uncovered, in a preheated oven for 20 to 25 minutes.
Serve with rice and stir-fried vegetables.
Melt-in-your-mouth Prime Rib Recipe with 1,000 5-star reviews. You'll be a convert after using our recipe and cooking method. This is one of the most popular Prime Rib recipes online.
INGREDIENTS
Prime Rib
- 1 2-6 Bone Prime Rib Roast (Boned and Tied)
- 3 tbsp olive oil
- 3-4 clove garlic (Sliced or Minced)
Prime Rib Rub
- 1 tbsp Dried Thyme
- 1 tbsp Dried Rosemary
- 1 tbsp Black Pepper
- 1 tbsp Onion Powder
- 1 tbsp Garlic Powder
- 2 tbsp Kosher Salt
INSTRUCTIONS
- Remove the prime rib from the refrigerator 4 hours before cooking.
- OPTIONAL: Minutes before cooking, bone and tie the roast.
- Cut 1/2" slits on the top of the roast and insert minced or sliced garlic.
- Rub the outside of the roast with high quality olive oil.
- Combine the rosemary, thyme, kosher salt, black pepper, onion powder and garlic powder and spread evenly over the roast.
- Let rest while the oven pre-heats to 500 degree F (260 degree C).
- Transfer the roast to a roasting pan, bone side down.
- Insert the thermometer into the center of the roast and place in the oven (2nd rack from the bottom).
- Calculate your initial cooking time by allowing 5 minutes per pound of meat (a 9 lb roast would cook for 45 minutes while a 6 lb roast would cook for 30).
- This will provide a nice crunch on the exterior. The seasoning rub will get charred but that's what creates the deeply savory crust.
- After your calculated cooking time is up, turn the oven off but DON'T OPEN THE OVEN DOOR.
- After 2 hours the center of your roast will be 135 degrees F, which is medium-rare.
- If you prefer medium just keep it in the oven until it reaches 150 degrees F.
- Remove from the oven and let rest for 10 minutes.
NOTES
Resting - your roast will increase in temperature the longer it rests. If you plan on resting your rib for 20-25 minutes, to cook other items, only cook your roast to 115 degrees. Your roast will rise in temperature to approx. 135 degrees after a 20 minute rest period.
NUTRITION
Calories: 1129kcal | Carbohydrates: 2g | Protein: 50g | Fat: 101g | Saturated Fat: 41g | Polyunsaturated Fat: 4g | Monounsaturated Fat: 45g | Cholesterol: 219mg | Sodium: 1559mg | Potassium: 835mg | Fiber: 1g | Sugar: 1g | Vitamin A: 25IU | Vitamin C: 1mg | Calcium: 46mg | Iron: 6mg
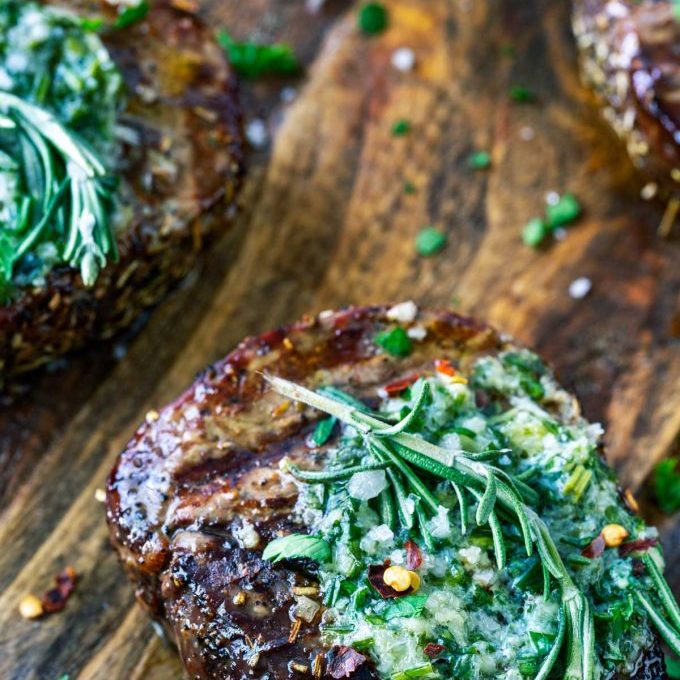
Fillet mignon is known for being the most tender cut of steak. Because it’s a leaner cut of beef, it’s best served medium or medium-rare to keep it from drying out and losing that wonderful texture.
So today, I’ll be showing you how to grill fillet mignon to perfection! Whether you use an outdoor gas grill or Ninja Foodi Indoor Grill, I know you’re going to love this simple but indulgent steak recipe
Grilled Filet Mignon - Ninja Foodi Grill or Outdoor Grill
Prep Time5 mins
Cook Time10 mins
Total Time15 mins
Course: Main
Cuisine: American
Keyword: Steak
Servings: 6
Calories: 332kcal
Author: Wendy Polisi
Equipment
-
Ninja Foodi Grill or
-
Outdoor Grill
Ingredients
- 1 ½ pounds filet mignon
- 1 tablespoon avocado oil
- 1 teaspoon dried rosemary finely chopped
- ¾ teaspoon sea salt
- ½ teaspoon fresh ground black pepper
- Compound Butter optional
Instructions
-
Brush the steaks with avocado oil.
-
Season the steaks with rosemary, salt, and pepper and allow to sit at room temperature for 1 hour
Outdoor Grill
-
Preheat the grill to 500° F
-
Cook for 5 minutes per side or until the internal temperature reaches 120° F for medium-rare.
-
Place sliced compound butter on top.
-
Tent with foil and allow to rest for 10 minutes before serving
Ninja Foodi Grill
-
Select the Grill Function and set the heat to Hi. Set the time to 10 minutes for medium, or 8 minutes for medium-rare.
-
When the grill is preheated, add the steaks.
-
Cook, flipping halfway through until the internal temperature reaches 120° F for medium-rare.
-
Place sliced compound butter on top.
-
Tent with foil and allow to rest for 10 minutes before serving.
Nutrition
Calories: 332kcal | Carbohydrates: 1g | Protein: 21g | Fat: 27g | Saturated Fat: 10g | Polyunsaturated Fat: 1g | Monounsaturated Fat: 12g | Cholesterol: 79mg | Sodium: 346mg | Potassium: 347mg | Fiber: 1g | Sugar: 1g | Vitamin A: 1IU | Vitamin C: 1mg | Calcium: 9mg | Iron: 3mg

These tasty ribs will take you back to the days where you lounged around the pool on the hot summer days.
-
- SERVES: 6
- RATING: DIFFICULTY: MODERATE
- PREP TIME: 45 MINS |
- COOK TIME: 2:45 HOURS
The Marinade
knob of butter
1 large onion, finely diced
2 garlic cloves, finely diced
knob of ginger, finely grated
1 tsp (5 ml) dried rosemary
1 tsp (5 ml) dried thyme
1 tsp (5 ml) dried parsley
2 C (500 ml) Coke
¾ C (190 ml) tomato sauce
¾ C (190 ml) chutney
2 Tbsp (30 ml) soya sauce
juice of 1 lime
The Ribs
6 large beef short ribs
salt and pepper
canola oil, for frying
5 cloves garlic
5 sprigs of thyme
6 C (1 ½ liters) good quality beef stock
The Marinade
In a medium size saucepan over a medium heat, fry the onions in the knob of butter until they soften and begin to colour.
Add the garlic and ginger and fry for another minute. Add the rest of the ingredients and stir well to combine.
Bring the saucepan to the boil then turn down the heat and simmer for 20 minutes until the marinade thickens.
The Ribs
Preheat the oven to 180 °C.
Season the beef well with salt and pepper.
Heat the oil in a large frying pan over a high heat. Sear the beef, two pieces at a time, until you have a seared crust on all sides.
This step is crucial for flavor so don’t rush it! Take your time and sear the meat as you would a steak. The better the crust the better the flavor.
Place the garlic and thyme into a large roasting tray and arrange the ribs on top.
Add the stock until the ribs are almost half covered.
Seal tightly with heavy duty foil and braise in the oven for 2 hours.
At the 2hour mark, check the ribs and if they are not fork tender then braise for a further 30-45 mins.
When the ribs are fork tender remove them from the oven and allow to cool.
The Mielies
In a large saucepan over medium-high heat, boil the mielies in salted water for 10 minutes.
Drain the water and add the butter and chives to the saucepan. Toss to coat the mielies and set aside.
To serve
Remove the ribs from cooking liquid and paint with the marinade. Finish over the braai or grill to caramelize
Ingredients
- 600 g well-aged, sirloin steak with no more than 1cm fat - fat scored in a crisscross pattern
- sea salt and pepper
- For the herb board:
- as much variety as you can lay your hands on - coarsely chopped
- 1 Tbs finely chopped red chili
- Juice and rind of a large lemon
- salt and pepper
- lots of olive oil
- balsamic vinegar
- For the pan-fried potatoes:
- 4 medium potatoes - skin on, cut into chunks
- olive oil
- 6 garlic cloves in their skins
- 1 sprig rosemary
Instructions
For the braai: Prepare a good bed of hot coals in a barbecue. Season the sirloin by rubbing it with sea salt, freshly ground pepper and olive oil.
Place on the grid, fat side down and at least 30cm above the coals for a good 10 minutes to render the fat. Keep an eye on it so it doesn’t blacken, pulling it away from the heat a little if necessary.
To make the potatoes: You can do this slightly ahead of time. Parboil the potato in salted water for 10 minutes. Heat olive oil in a nonstick pan over medium heat. Drain the potatoes and throw into the pan. Add the garlic. Toss until well browned on all sides.
Scrape the leaves from the rosemary sprig into the pan, add salt and pepper and drain out the oil, leaving the potatoes in the warm pan while the meat cooks.
Prepare the herb board: Toss together all the ingredients. Set aside on a large board.
Back to the braai: Once you’ve rendered the fat, lower the grid right over the coals and cook your meat on all sides, turning frequently. I strongly recommend rare or medium rare, which means it’ll require a total cooking time of about 15 minutes. Whatever you do, it is important to place the meat on top of the prepared herb board to rest for 7 to 8 minutes.
To serve: Warm up the potatoes. Once the steak has rested, use a very sharp knife to slice it into thin slices. Rub the meat into the herbs, turn over and drizzle with a good amount of olive oil and drops of balsamic vinegar.
Serve with the delicious, sautéed potatoes.
An indulgent potjie for a cool evening.
Ingredients
olive oil ?2 - 3 sliced ox tails ?250 g diced bacon ?2 large, chopped onions ?3 - 4 large, diced carrots ?1 clove chopped garlic ?1 can peeled tomatoes? Salt? Black pepper? Thyme ?4 bay leaves
1kg baby potatoes
300ml good red wine?250ml cream?
Instructions
Season oxtail with salt and black pepper. Bring no.3 potjie up to heat and lubricate with drizzle of olive oil. Add oxtail and bacon and braze.
Remove oxtail and bacon, add onions, carrots, garlic, tomatoes, bay leaves and wine to potjie and bring to boil. Add oxtail and bacon and season with salt, black pepper and thyme. Cook for 3 hours.
Add baby potatoes and cook for 15 minutes.
Add cream and cook for 15 minutes. Remove from heat and rest for 15 minutes.
Serve on brown rice with grilled veg side (optional) and your favorite red (not negotiable).
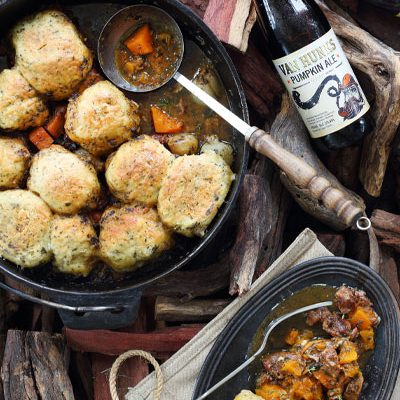
This one pot wonder really is an all-in-one meal. The slow cooked beef shin is melt-in-the-mouth.
Pot
1.5 kg beef shin (bone-in)
salt and pepper to taste
a splash of oil for frying
1 large onion, chopped
1 Tbsp (15 ml) garlic, finely chopped
2 Tbsp (30 ml) fresh thyme, chopped
2 Tbsp (30 ml) fresh sage, chopped
1 tsp (5 ml) ground cinnamon
1 bottle Van Hunk’s Pumpkin Ale
3 Tbsp (45 ml) No MU beef fond
1 tsp (5 ml) corn flour
¼ C (60 ml) water
1 kg pumpkin, diced
12 baby onions, peeled
Dumplings
500 g cake flour
2 tsp (10 ml) baking powder
1 ½ tsp (7.5 ml) salt
100 g butter
100 g feta, crumbled
1 Tbsp (15 ml) fresh thyme, chopped
1 Tbsp (15 ml) fresh sage, chopped
250 ml cold water
Pot
Season your meat with salt and black pepper, then brown over a smoking hot fire to seal. Once the meat has cooled enough to work with, cut it into bite-size chunks. Keep the bones with the marrow for extra flavor in the pot. Heat a splash of olive oil in a cast iron pot and fry the sliced onion until golden. Add the garlic, thyme, sage and cinnamon, and fry for another minute. Add the meat and bones to the pot, and then pour in the pumpkin ale and the stock. Simmer with the lid on for 1 hour. Mix the corn flour with the water then add it to the pot, along with the pumpkin and baby onions. Stir to combine – ensure you combine it well, as this is the last time you are going to stir it. Cook with the lid on for another 45 minutes. In the mean while prepare the dumpling dough.
Dumplings
Sift the flour, baking powder and salt together. Rub in the butter with your fingertips, then add the feta and herbs. Add the cold water and mix until you have a soft dough. Break off golf ball-sized pieces and place them in the pot, on top of the liquid. Cook for 30 minutes with the lid on, until the dumplings are ready.
To get some color on the dumplings, put some coals on top of the lid, or alternatively use the grill in the oven to toast them up.
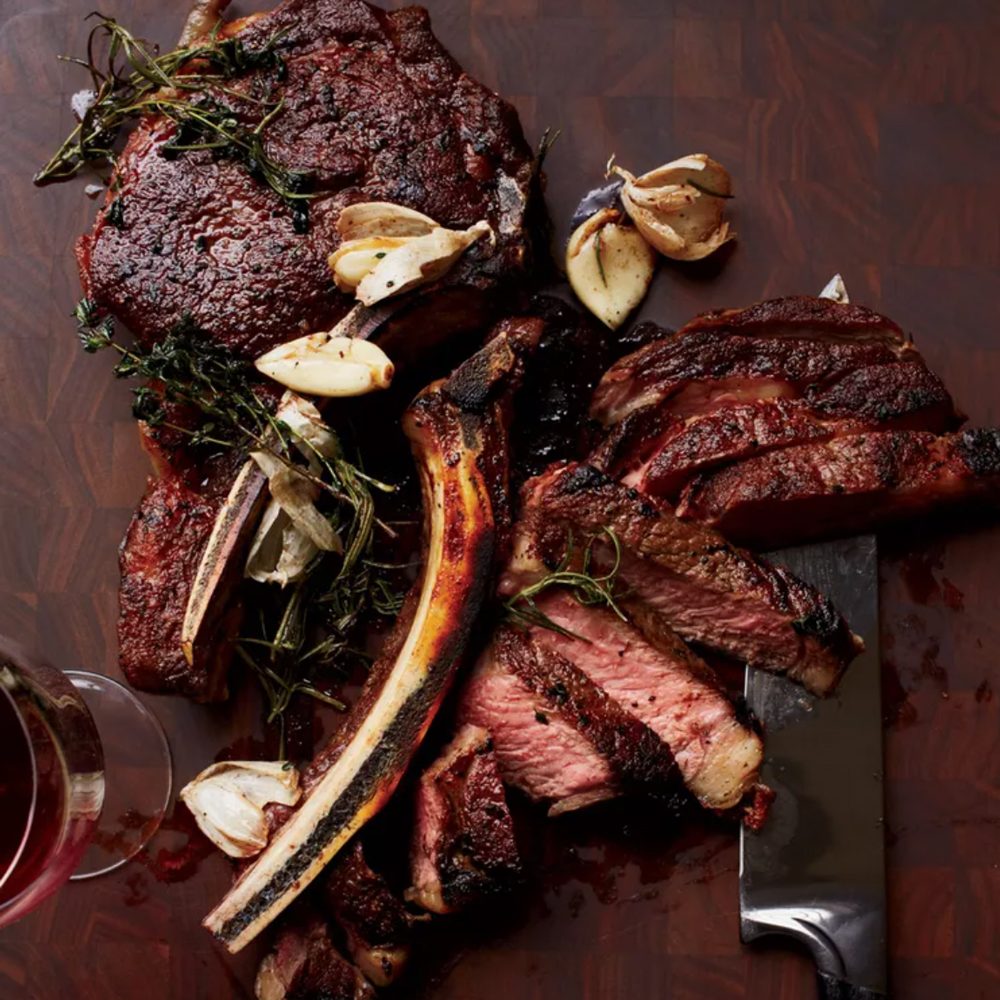
Rib eye steak can seem intimidating to cook, but this recipe couldn't be simpler. Based on a recipe from Alain Ducasse, this rib eye steak method has essentially two parts: seasoning the meat well and letting it stand at room temperature for at least half an hour, and then cooking them in a hot cast iron skillet. Halfway through cooking, these bone-in rib eyes are basted with a mixture of butter, thyme and garlic that's already in the skillet, so they're crusty outside and richly flavored. And don't worry about any special equipment. For these ribeyes, all you need is a sturdy pan and a spoon.
Ingredients
Two 1 1/4-pound, bone-in rib eye steaks
Kosher salt
Freshly ground pepper
2 tablespoons canola oil
4 tablespoons unsalted butter
4 thyme sprigs
3 garlic cloves
1 rosemary sprig
Directions
Season the rib eye steaks all over with salt and freshly ground pepper. Let the meat stand at room temperature for 30 minutes.
In a large cast-iron skillet, heat the canola oil until shimmering. Add the steaks and cook over high heat until crusty on the bottom, about 5 minutes. Turn the steaks and add the butter, thyme, garlic and rosemary to the skillet. Cook over high heat, basting the steaks with the melted butter, garlic and herbs, until the steaks are medium-rare, 5 to 7 minutes longer. Transfer the steaks to a cutting board and let rest for 10 minutes. Cut the steaks off the bone, then slice the meat across the grain and serve.
Suggested Pairing
Pair boldly tannic Cabernet Sauvignon with these indulgent rib eyes.
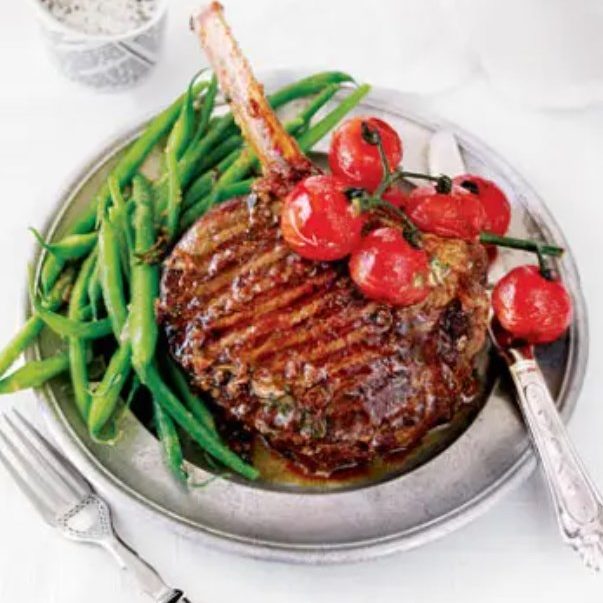
- Abigail Donnelly
- 4
- Easy
- Carb Conscious Dairy free
- 10 minutes
- 10 -15 minutes
INGREDIENTS
- 4 x 300 g prime rib steak
- 2 T olive oil
- 8 anchovy fillets
- 100 g butter
- 2 T fresh thyme
- 2 cloves garlic, crushed
- Blistered Mediterranean vine tomatoes
- Blanched green beans
COOKING INSTRUCTIONS
Preheat the oven to 180°C.
Rub all the portions of prime rib steak in the olive oil and seal on a hot griddle pan for 3 minutes on each side.
Transfer to a baking tray and finish off in the oven for 5 minutes, or until cooked to your liking.
Smash the anchovy fillets and fold through the butter along with fresh thyme and garlic cloves, crushed.
Melt in a small saucepan and season.
Serve generously drizzled over the steaks with blistered cherry tomatoes and blanched green beans.
Cook's tip: you can also cook the steaks over hot coals
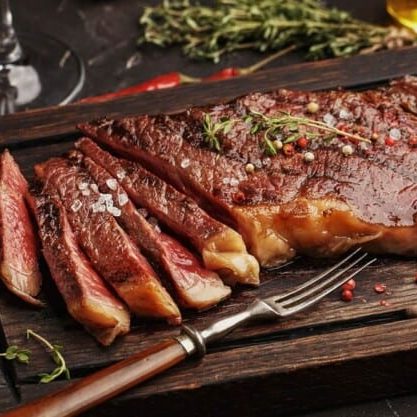
Sirloin steak is a popular beef cut that is fuller flavored than fillet and leaner than a ribeye. Find out all about it, what muscle it is, where it comes from on a side of beef, where to buy it, and how to cook it with three of our favorite recipes.
The sirloin steak comes from the sirloin primal, and there’s nothing elusive about this cut, it’s a plain and simple good ol’ steak that the majority of people love!
Always finding itself high up on the favorites, we thought that we should serve up this sirloin guide to help ensure you know all there is to know about it.
From its flavor and texture to where to get your hands on it, along with some of the best recipes around, after reading this guide, you’ll be a sirloin specialist.
So, whether you’re a grilling beginner or a hardcore enthusiast, there’s a lot of info in this guide that will up your BBQ game for sure.
Note: We also have a beef cuts diagram you can check out, that shows all the popular cuts of beef and where they come from.
What is sirloin Steak?
One of the most popular steaks for grilling, the sirloin steak, also commonly known among those in the know as the Top sirloin steak, is a versatile cut that is juicy and delicious.
It sits in the sirloin primal next to the loin, which is a step away from the home of other famous cuts such as the Porterhouse and the T-bone steak.
Nearly always gracing the menu pages of every restaurant around, you’ve probably had one of these guys at some point in your life.
Where Does Sirloin Steak Come from on the Cow?

The sirloin steak comes from the sirloin primal, which runs from the 13th rib all the way to the end of the hip bone.
The sirloin primal is split into two sections:
Top sirloin Butt — where the steaks produced are typically best grilled.
Bottom sirloin Butt — where those cuts are great for roasting and ground beef.
In the middle of these two cuts, the Tenderloin cut can be found.
The sirloin steak comes from the top sirloin Butt, hence why it’s sometimes anatomically known as the top sirloin steak.
What is Sirloin Steak Also Known As?
Legend has it that the sirloin steak is called as such because Henry VIII was so impressed by it that he knighted it and called it ‘Sir Loin,’ and the name has stuck ever since.
Whether this is true or not, no one knows, but it’s a story that sounds good to us!
There are many other cuts with sirloin labels, such as sirloin tips, sirloin flap and even petite sirloin, which are all very different pieces.
So just in case there’s any confusion at the counter, the Industry ID for the sirloin steak is 1184 (IMPS/NAMP).
Flavor, Texture, Fat Content and Tenderness
Top sirloin steak is lean, juicy, and described as moderately tender, with a medium strength beef flavor. So if cooked right — chefs preferred temp of medium rare, approx 130 F measured with a meat thermometer — it can be a real winner! Cooked higher, it will be less tender.
It has very little fat or marbling running through it, and it can come with or without the fat cap on.
In some boutique butchers or Latin American butchers, the sirloin steak itself is cut up into separate steaks, and when cut separately the very top of the sirloin steak with the fat cap on is called the sirloin Cap, or the Picanha.
Orinigan source: food fire friends
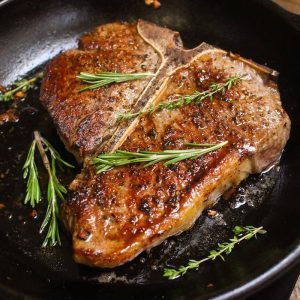
Porterhouse Steak Recipe
This Porterhouse Steak rivals that of your favorite steakhouse restaurant! Here you’ll learn everything you need to know to make a perfect porterhouse every time.
prep time: 5 MINS
cook time: 10 MINS
total time: 15 MINS
servings: 4 people
Ingredients
1 1/2 pounds porterhouse steak, about 1-inch (2.5cm) thick*
2 tablespoons olive oil, divided**
1 teaspoon coarse salt, or to taste
1 teaspoon black pepper, freshly ground, or to taste
2 cloves garlic, minced (2 teaspoons)
1 tablespoon unsalted butter
fresh herbs, such as rosemary and thyme, optional
Instructions
Remove the porterhouse steak from refrigerator 30-60 minutes before cooking to let it reach room temperature. This promotes even cooking for the juiciest steak.
Position the oven rack in the middle and preheat oven to 425°F (218°C).
Place a large cast-iron skillet over high heat and allow to heat for 5 minutes until extremely hot. (You can also place in the preheated oven for 15 minutes.)
Pat dry the steak with paper towels to remove excess moisture that could interfere with searing.
Rub 1 tablespoon of olive oil on both sides.
Season both sides with salt and pepper.
Add the remaining 1 tablespoon oil to the pan and swirl to coat.
Carefully place the porterhouse in the pan using kitchen tongs, laying it away from you to avoid splatter.
Sear the first side for 2 minutes.
Flip using kitchen tongs and sear the other side for 2 minutes.
Add garlic, butter and fresh herbs to the pan. Then immediately transfer the skillet to the oven.
Bake without flipping the steak according to your desired doneness: 1-2 minutes for rare, 2-3 minutes for medium-rare, 3-4 minutes for medium, and 5-6 minutes for well-done. Check doneness using an instant-read thermometer***.
Remove steak to a plate or cutting board covered with aluminum foil to rest for 5 minutes so the juices can retreat back into the meat.
To serve, cut the meat away from the bone and slice across the grain into strips.
Notes
*Porterhouse steaks that are at least 1-inch (2.5cm) thick are juicier and less likely to be overcooked.
** Regular refined olive oil works best, as it has a higher smoke point than extra virgin olive oil.
***Insert the thermometer into the strip section about 1-inch from the bone: 120°F/49°C is rare, 130°F/54°C is medium-rare, 140°F/60°C is medium, 150°F/66°C is medium-well and 160°F/71°C is well-done. (Note that the temperature will continue rise several degrees more after cooking.) For thicker porterhouse steaks, you'll need 2-3 minutes of extra baking time per additional 1/2-inch.
Nutrition Facts
Porterhouse Steak Recipe
Amount Per Serving (6 oz)
Calories 469Calories from Fat 315
% Daily Value*
Fat 35g54%
Saturated Fat 13g65%
Cholesterol 103mg34%
Sodium 674mg28%
Potassium 526mg15%
Carbohydrates 1g0%
Fiber 1g4%
Sugar 1g1%
Protein 35g70%
Vitamin A 92IU2%
Vitamin C 1mg1%
Calcium 13mg1%
Iron 3mg17%
* Percent Daily Values are based on a 2000 calorie diet.
Slowly pot-roasting this cut produces tender slices of beef with plenty of well-flavoured sweet red wine gravy.
Preparation time:10 minutes
Cooking time:210 minutes
Total time:3 hours 40 minutes 60 minutes 60 minutes 60 minutes 40 minutes
Serves: 6
Ingredients
2 tbsp vegetable oil
1kg Hereford or Aberdeen Angus silverside of beef
20 shallots, peeled
3 Cloves garlic, sliced
½ x 15g pack fresh thyme
1 rosemary sprigs
2 bay leaves, torn
300 ml red wine
250ml hot beef stock
3 tbsp tomato purée
1 tbsp cornflour (optional)
Method
Preheat the oven to 170C, gas mark 3. Heat the oil in a large, flameproof casserole (with a well-fitting lid). Sear the beef over a high heat for 4-5 minutes, turning regularly so that the outside is a golden brown all over.
Transfer the beef from the pan to a plate and keep warm.
In the same pan, fry the shallots and garlic for 2-3 minutes, until starting to colour.
Meanwhile, make the bouquet garni by tying together the thyme, rosemary and bay leaf with a piece of kitchen string. Stir in the red wine with the beef stock and tomato purée. Return the beef to the pan. Add the bouquet garni, season and bring to the boil.
Cover and transfer to the oven for 3 to 3 and a half hours, turning the beef in the liquid halfway through cooking. Remove the beef from the pan, cover with foil and keep warm.
Allow to rest for 20 minutes before slicing. Remove the bouquet garni and discard.
Meanwhile, if you want your gravy thicker, add a little cold water to the cornflour to make a paste before stirring into the gravy.
Return the casserole to the hob and bring to the boil, stirring. Serve with the thickly sliced beef, curly kale and creamy mashed potato.
Original source: waitrose
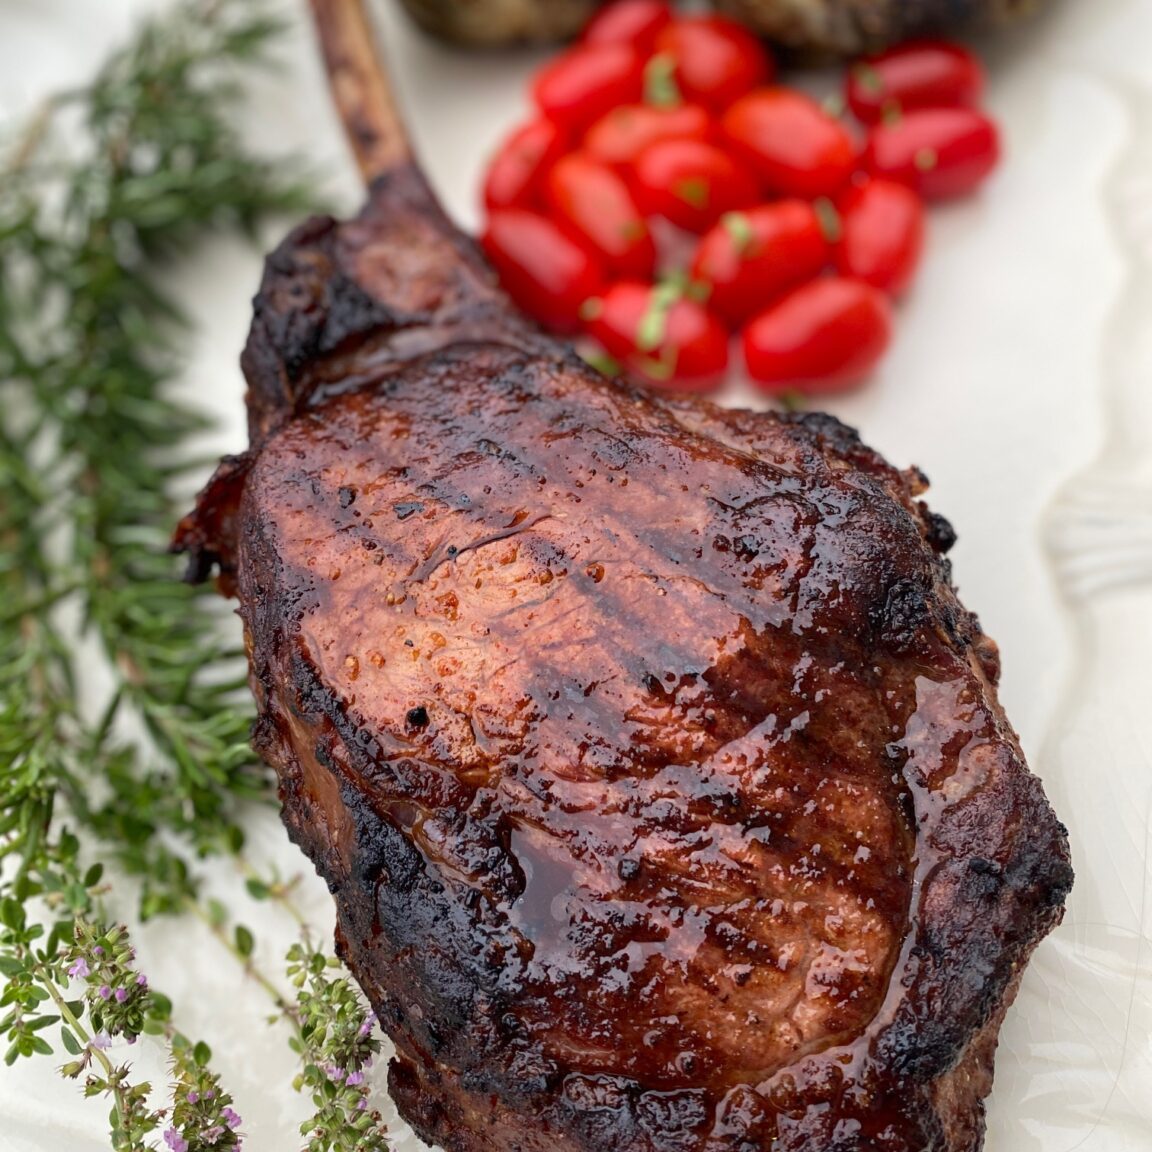
This glorious cut of meat is actually a large ribeye steak that is specifically cut with about 8-12 inches of the rib bone left on it.
The bone is “Frenched”, a culinary term that means it is trimmed of fat and meat. The Tomahawk steak is meant to look like the handle of an ax. It’s the same technique that is used on a rack of lamb.
The bone is intended to give it the “wow” factor however it also helps insulate the tender meat while it cooks.
The Tomahawk steak is extremely tender and buttery, with beautiful marbling. It’s also relatively simple to make!
Because of its size and 2″ thickness this steak requires a different cooking method than a regular sized steak, which usually just gets a quick sear on the grill.
We chose the indirect “reverse sear” method for our Tomahawks and we’ll show you how to do it, with step-by-step directions, so you will get it just right every time!
A Tomahawk steak is a tender, buttery, delicious show stopper! They are easy to make with our step-by-step guide on how to Reverse Sear a Tomahawk.
Prep Time
10 mins
Cook Time
40 mins
Total Time
50 mins
Course: Main CourseCuisine: American, BBQ Servings: 4 servings Calories: 493kcal Author: Cyndy Ufkes – The Art of Food and Wine
Equipment
Grill
Ingredients
The steak:
2.8 pounds Tomahawk Steak with bone attatched.
2 Tablespoons Kosher Salt
Ingredients for the Rub:
2 Tablespoons olive oil
1 Tablespoon sweet paprika
1 teaspoon black pepper, freshly ground
4 cloves garlic, crushed and minced
Instructions
Liberally salt the steak all over with kosher salt.
Place steak on a baking sheet (on a rack if you have one) for 12-24 hours uncovered in the refrigerator.
Remove steak from refrigerator and allow to come to room temperature. (The internal temperature of the steak should be around 70˚F before cooking).
This is an important step so don't skip it!
Preheat the oven to 200°F.
Coat the steak liberally with the spice rub and let sit for about 15 minutes on the rack.
Prepare the rub mixture which is a thick paste of olive oil, paprika, black pepper, and crushed garlic
Cook steak, on the rack and baking sheet, until the internal temperature reaches your desired doneness. Use an instant-read thermometer for best results. (The cooking time can be anywhere from 35-50 minutes)
– Rare = 120°F (cool red center)
– Medium Rare = 125°F (warm red center)
– Medium = 130°F (warm pink center)
NOTE: The time will vary depending on the cut of your steak and your individual oven. No two are ever the same!
While steak is cooking in the oven start the grill and heat to medium-high,
Remove steak from the oven and transfer it to the preheated grill. Sear evenly on each side for about 3 minutes to obtain grill marks.
Remove from the grill and let the steak rest, uncovered, for 5 minutes.
Cut steak away from the bone, and slice against the grain into 1/2-inch pieces.
For best presentation arrange the cut steak around the bone.
Notes
Every steak is cut a little differently so using an instant-read thermometer will help you get the best results.
Be sure to allow the steak to come to room temperature before cooking them (70˚F). This is an important step so don’t skip it!
The steaks used for our testing were 2.8 pounds.
Cooking time will vary based on the size of your steak, so this is just a guide.
If you don’t have fresh garlic for the rub you can substitute 1 Tablespoon of garlic powder.
Nutrition
Serving: 8ounces | Calories: 493kcal | Carbohydrates: 1g | Protein: 41g | Fat: 36g | Saturated Fat: 14g | Polyunsaturated Fat: 2g | Monounsaturated Fat: 19g | Cholesterol: 125mg | Sodium: 3595mg | Potassium: 571mg | Fiber: 1g | Sugar: 1g | Vitamin A: 106IU | Vitamin C: 4mg | Calcium: 24mg | Iron: 4mg
Original source: The art of food and fine
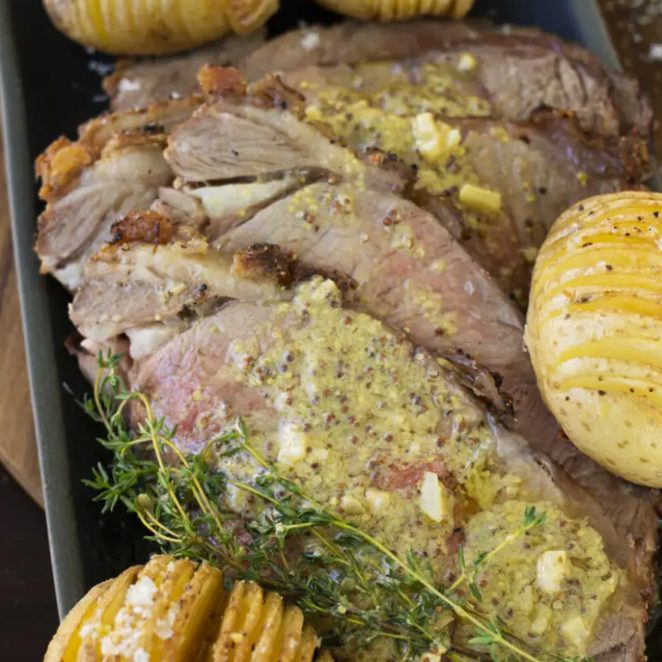
INGREDIENTS
1 whole sirloin steak of about 2kg
6 large potatoes
salt and pepper
For the sauce:
Butter
2 garlic cloves, chopped and crushed
olive oil
fresh thyme
1 fresh chili, chopped
1 tot brandy
1 tot Dijon mustard
1 tot wholegrain mustard
METHOD
Score the fat side of the sirloin by using your sharpest knife and cutting through the fat n a diamond shape.
Season with salt and pepper and sear over very high heat for a few minutes until the outside is charred.
Place the sirloin into your gas grill or kettle braai and let this braai over medium heat for about 1 hour, use a meat thermometer to check the temperature. Once you reach 52 degrees, the meat is done (medium rare) and you can take it out to rest for 10 minutes before cutting into slices.
For the Potatoes
Cut into the hasselback method. Use two wooden spoons and place the potato in the middle. Cut the potatoes into thin slices without slicing all the way through. The wooden spoons will help you achieve this method by stopping the knife from going all the way through.
Season with salt and pepper and olive oil. Bake in your gas braai or oven for about 1 hour until soft on the inside and crispy on the outside.
For the sauce:
Use a fireproof pan and place over medium heat.
Add the butter and olive oil to the pan. Then the garlic, thyme, chili, brandy and mustard. Let this simmer for 2 minutes and serve immediately over your steak and potatoes.
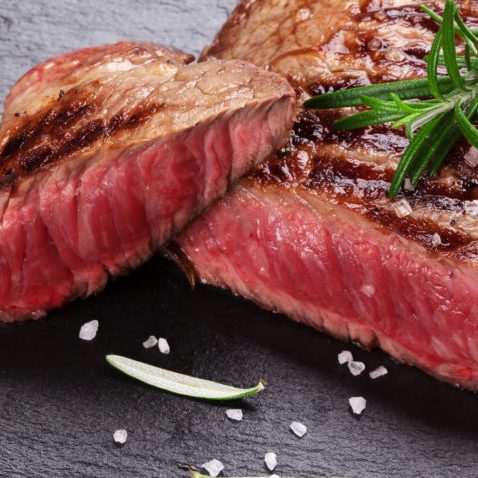
Course Main Dish
Cuisine Gluten-free, Local ingredients
Servings: 6
Ingredients
3 lbs locally-raised beef top sirloin steaks
1 1/2 tsp garlic powder
3 cloves locally-grown garlic, minced
1 pinch salt and pepper, to taste
Instructions
Preheat an outdoor grill for high heat.
In a small saucepan, melt butter over medium-low heat with garlic powder and minced garlic. Set aside. Sprinkle both sides of each steak with salt and pepper.
Grill steaks 4 to 5 minutes per side, or to desired doneness. When done, transfer to warmed plates. Brush tops liberally with garlic butter, and allow to rest for 2 to 3 minutes before serving.
Original source: msmarket
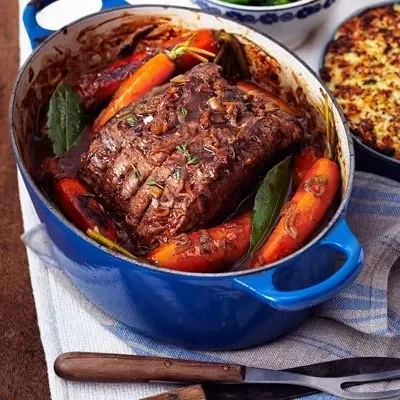
This Slow Roast Silverside Beef Recipe is the perfect way to cook beef for a Sunday roast dinner. The beef is cooked slowly in the oven, allowing the flavours to develop and the meat to become incredibly tender. This recipe is simple to follow and results in a delicious, juicy piece of beef that will be enjoyed by all.
This Slow Roast Silverside Beef Recipe is the perfect way to enjoy a delicious and juicy roast beef dinner without having to spend hours in the kitchen! The slow roasting process ensures that the beef is cooked to perfection, and the result is a tender and flavorful piece of meat that will have your family and friends coming back for seconds!
Is Beef Silverside Good for Roasting?
Beef silverside is a cut of beef that comes from the hindquarters of the cow. It’s a leaner cut of meat, which makes it ideal for roasting. When cooked properly, beef silverside should be tender and juicy.
Here are some tips for cooking beef silverside: – Season the meat with salt, pepper and any other desired spices. – Place the beef silverside in a roasting pan or Dutch oven.
– Add enough water or stock to come up about halfway up the sides of the meat. – Cover the pan tightly with foil or a lid and roast in a preheated oven until the beef is cooked through (internal temperature should be at least 145 degrees Fahrenheit). – Let the meat rest for 10 minutes before slicing and serving.
How Do You Make Silverside Tender?
If you’re looking to make silverside tender, there are a few things you can do. First, make sure that you choose the right cut of beef. Silverside is a leaner cut, so it’s important to not overcook it.
Second, you can cook it slowly in a braising liquid to help tenderize the meat. Third, if you’re pan-frying it, make sure to use a hot pan and don’t overcrowd the meat so that it sears properly. Finally, let the meat rest after cooking so that the juices can redistribute throughout.
By following these tips, you should be able to make silverside that is both tender and flavorful.
How Do You Cook Sainsburys Slow Roasting Silverside Joint?
Slow Roasting Silverside Joint Ingredients: 1 Sainsbury’s slow roasting silverside joint
2 carrots, peeled and roughly chopped 2 onions, peeled and roughly chopped 3 sticks of celery, roughly chopped
1 head of garlic, cloves peeled and left whole 2 bay leaves 4-5 black peppercorns
Method: Preheat the oven to 140C/285F/Gas 1. Put the meat into a large lidded roasting tin or casserole.
Add all the vegetables except the garlic, along with the bay leaves and peppercorns. Pour over 1.5 litres/50fl oz/scant 3 pints boiling water. Put on the lid and place in the oven.
Cook for 5 hours until very tender. Remove from the oven and leave to rest for 20 minutes before carving into thick slices. To make gravy, remove any excess fat from the tin then put it back on the hob over a medium heat.
Stir in 2 tablespoons plain flour then gradually add 500ml/18fl oz/2 cups beef stock until you have a smooth gravy consistency.
Should I Sear Silverside before Roasting?
If you’re planning on roast silverside, you might be wondering if you should sear it before cooking. The answer is: it depends. Searing the meat before roasting can help to create a flavorful and crispy crust on the outside of the meat, while also locking in moisture so that the inside stays juicy.
On the other hand, skipping the sear can save you time in the kitchen. So, ultimately, it’s up to you whether or not to sear your silverside before roasting. If you do decide to sear it, make sure to use a hot pan so that the meat browns evenly all over.
Credit: www.supergoldenbakes.com

Slow Roast Silverside Beef Cooking Times
If you’re looking for a delicious, hearty meal that will satisfy even the most discerning palate, look no further than slow roast silverside beef. This delectable dish is perfect for a winter’s day or any time you’re craving something truly special. Here’s everything you need to know about slow roast silverside beef, including cooking times and tips for the best results.
Slow roast silverside beef is a cut of beef from the hindquarter of the cow. It’s a leaner cut of meat, which makes it ideal for slow roasting. The high fat content in other cuts of beef can make them tough and chewy when cooked slowly, but silverside beef stays tender and juicy.
That’s why it’s such a popular choice for pot roasts and other slow-cooked dishes. When it comes to cooking times, there are two schools of thought on how long to cook silverside beef. The first camp believes that longer is better, Slow roast your silverside over low heat for 8 hours or more until it reaches an internal temperature of at least 145 degrees Fahrenheit.
This will result in extremely tender meat that practically melts in your mouth. If you have the time and patience for this method, go ahead and give it a try! The second camp believes that 4-6 hours is plenty of time to slow roast your Silverside and achieve excellent results.
We tend to agree with this camp, as we’ve found that anything beyond 6 hours can start to dry out the meat (even if it’s still technically cooked through). Plus, who wants to wait 8 hours or more for dinner? For perfectly tender Silverside Beef that isn’t dry or overcooked, aim for an internal temperature between 135-140 degrees Fahrenheit after 4-6 hours of slow roasting over low heat.
No matter which cooking method you choose, there are a few things you can do to ensure perfectly delicious results every time. First, be sure to season your Silverside generously with salt before cooking. This will help draw out moisture and keep the meat from drying out during cooking.
Next, wrap your Siliverside tightly in foil or butcher paper before placing it in the oven – this will help seal in moisture so your final product is extra juicy .
Roast Silverside Beef And Yorkshire Pudding
If you’re looking for a traditional British roast, look no further than silverside beef and Yorkshire pudding. Silverside is a cut of beef that comes from the hindquarters of the cow. It’s a leaner cut of meat, which makes it ideal for roasting.
The key to getting a juicy, flavorful roast is to cook it slowly and allow the meat to rest before carving. Yorkshire pudding is a staple of any British roast dinner. It’s made from a simple batter of eggs, flour, and milk, and cooked in hot fat until it’s golden and crispy.
Serve your silverside beef with creamy mashed potatoes, roasted vegetables, and gravy for a truly delicious meal.
Silverside Roast Beef Cooking Time
If you’re looking to make a delicious and juicy silverside roast beef, there are a few things to keep in mind. First, you’ll need to allow for about 1 hour of cooking time per pound of beef. So, if you’re making a 3-pound roast, plan on cooking it for about 3 hours.
Second, be sure to season your beef generously with salt and pepper before cooking. This will help to create a flavorful crust on the outside of the meat. To cook your silverside roast beef, preheat your oven to 325 degrees Fahrenheit.
Then, place the beef in a roasting pan and cook it for the appropriate amount of time (1 hour per pound). Once the beef is cooked through, remove it from the oven and let it rest for at least 15 minutes before slicing into it. This will allow the juices to redistribute throughout the meat, resulting in a juicier and more flavorful final product.
Enjoy!
Conclusion
This recipe for slow roast silverside beef is the perfect way to feed a crowd. The beef is cooked slowly in the oven, resulting in a tender and juicy meat that will have everyone coming back for seconds.
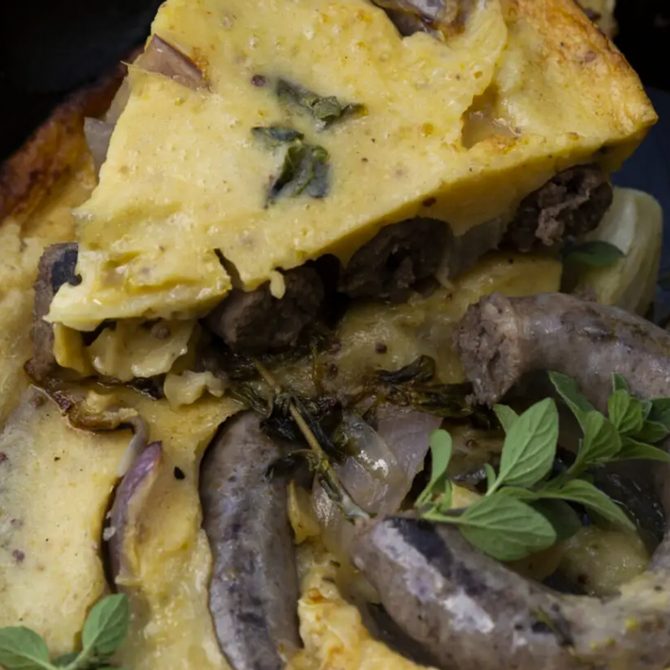
This recipe is based on the classis Toad in a Hole recipe, but I used good South African boerewors and ingredients to make is more local and lekker.
INGREDIENTS
1 cup milk
1 cup flour
2 eggs
1 teaspoon dijon mustard
salt and pepper
1 packet good quality boerewors
1 red onion, chopped
fresh herbs like thyme and rosemary
METHOD
Mix together the milk, flour and eggs and season with salt and pepper
Braai the boerewors over hot coals until 60% cooked in your hnged grid on the fire.
Fry the onions in your fireproof pan on the fire, add the boerewors and fresh herbs.
Pour the batter over the boerewors and move the pan to more mild and medium heat. Place the lid of your potjie on top with 3 or 3 coals to also bake it gently from the top.
Once the batter is cooked through, about 12 – 15 minutes, remove from the fire and let it cool down and serve in slices to your guests.
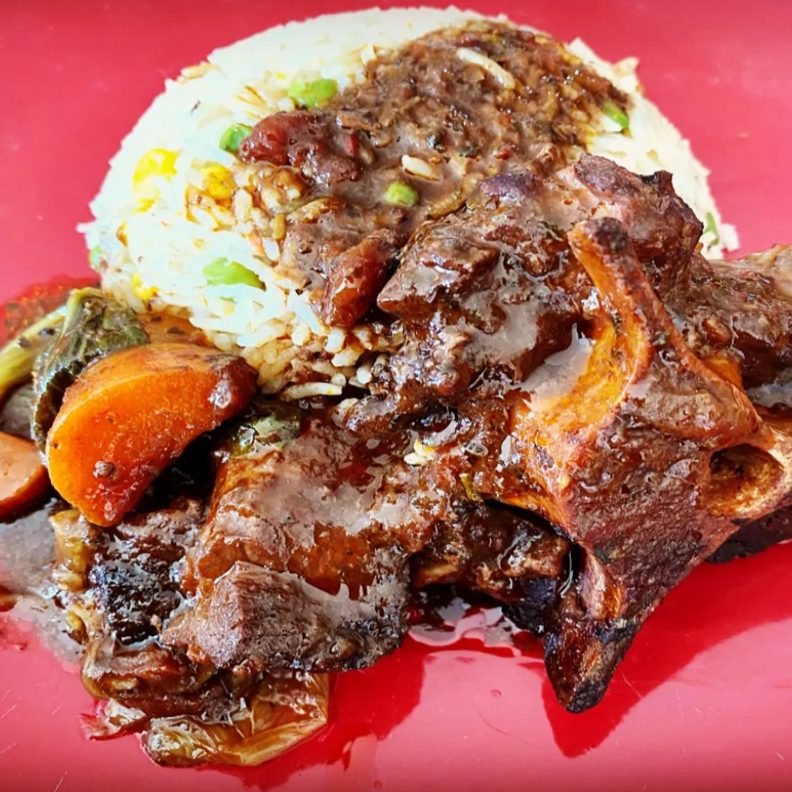
This recipe is very special to us as we have inherited this from our mother. As we have mentioned so many times before, our passion for all things food and kitchen comes from her.
Over the years, we have played around with the recipe and tried to perfect it to reflect our own cooking style of how to cook oxtail.
This is the ultimate comfort but for the lazy or those rushed off their feed. It’s a simple as throwing all the ingredients into the pot and letting the heat do the work.
INGREDIENTS
1.5 Kg Oxtail Pieces
2 Tsp Minced Garlic
2 Tbsp All Purpose Seasoning
300 ml Red Wine
2 Bay Leaves
1 Large Onion Diced
1 Can Chopped Tomatoes
400 ml Water
1 Branch Rosemary
INSTRUCTIONS
In a large saucepan, add all the ingredients- oxtail, water, rosemary onions, bay leaves, red wine, seasoning and garlic.
Cook on low heat for 2-3 hours or until oxtail is tender to your liking.
For a roasted/ charred finish, place oxtail stew in the oven at 200° Celsius for 20 mins.
Serve with mashed potatoes or rice to complete the hearty meal.
Enjoy!

INGREDIENTS (SERVES 6)
4 prime rib steaks (preferably dry-aged)
4 whole garlic bulbs (the ones with oversized cloves)
olive oil (the proper high-quality, extra virgin, cold-pressed South African type)
coarse sea salt
METHOD
Make a very hot fire. Bigger is absolutely better.
Now to braai the garlic. You can rinse them under running water and that’s about it. We are not peeling them, and they will go to the braai area as is. When the fire starts to perform its main purpose in life, which is to produce braai coals, scrape some of those coals from the fire and place them all around the garlic bulbs. If you really want to, you can even try and balance one coal on top of each bulb as well but it’s not really necessary. Our aim is to bake the garlic all the way through, so that it’s soft and mushy on the inside, by the time we braai the steak. If a coal burns through the skin of the garlic here and there it’s not a crisis; it caramelizes the flesh, adds character, and looks cool on photos. Garlic bulbs standing very close to a raging fire, surrounded by red-hot coals take about 30 minutes to cook all the way through.
Take the steaks out of the fridge when you start to braai the garlic. If there’s a lot of blood or juice in the packaging when you remove the steaks, wash the meat under cold water and pat dry with a paper towel. Remember the dogs (when you’re at home) and hyenas (when you’re in the bush) and keep the meat out of their way. Also cover the steaks to protect them from aerial attack by flies. Some people braai steaks straight from the fridge; I prefer them to be closer to room temperature when they hit the grid.
Braai the steaks on very hot coals for about 8 minutes in total, turning either once or three times. Make sure both sides face downwards roughly the same length of time. Use a watch to time it. If your steaks take longer than this to become medium rare, your coals probably weren’t hot enough. With prime rib, you could also balance the steaks with their bone side facing the coals for a minute. Before or during the braai you can also toss some coarse sea salt onto both sides of the steaks.
Remove the steaks and plate them. Drizzle with olive oil immediately so that the heat the steaks have from being braaied releases some flavors in the oil.
Remove the garlic bulbs from the fire and dust the ash off them. Serve one whole soft braaied garlic bulb with each steak. Guests can now squeeze the soft, cooked garlic flesh out of the bulbs and enjoy it with the steak. Add more olive oil and salt to taste.
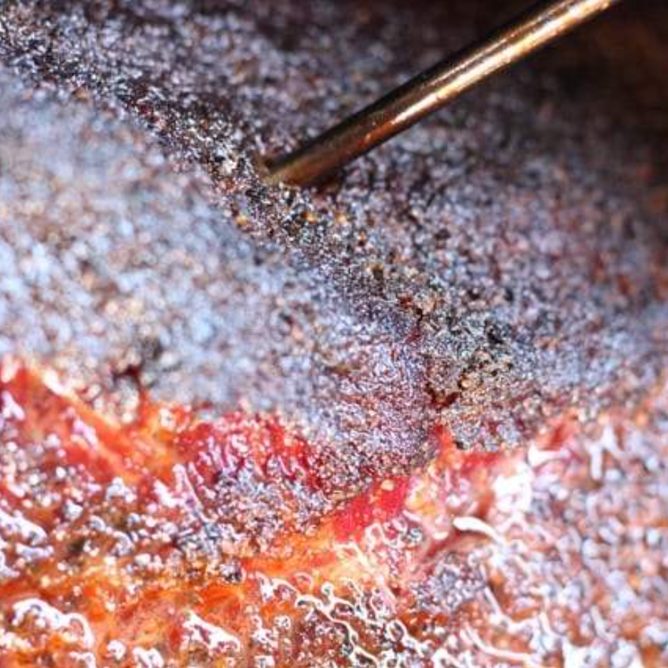
Avid followers of Angus & Oink will already be aware that we have somewhat developed a passion for brisket. If cooked right, beneath the dusken bark lays tender meat – juicy, melt in the mouth and irresistibly drool worthy. However, it’s not easy to cook brisket, many have tried and failed (ouch!) especially since it’s usually twice as thick on one side and difficult to cook through evenly. It’s because of this that we thought we’d let you into a few trade secrets to help you enjoy this amazing piece of meat.
Brisket itself is from the tough, muscly part of a cow, located in the lower breast or pectoral area and while it sometimes doesn’t have much fat through it, it is stacked with connective tissue – a great thing in slow cooking as we try and break them down and retain the juicy beefiness of the cut. The muscle itself is weight bearing during the life of the animal and that’s why its such a tough mother. This tissue is a natural self-basting element when the temperature is right – about 135F and up to 200F for melting, and is what helps your meat become so tender and flavoursome. A brisket itself is formed from two muscles know as the flat and the point. A full brisket is called a packer cut brisket and contains both point and flat muscles. The flat is what you might see in pastrami and lies under the fattier point part of the muscle. It’s much thinner than the point and with less fat and marbling it is less forgiving and harder to cook right and keep juicy. Fat CapWhen preparing the brisket for smoking in a BBQ, it can be a good idea to trim off the excess fat cap with a very sharp knife and also remove some of the connecting fat veins internal to the brisket. Some great videos on You Tube show this is a good deal of detail – Check Aaron Franklin for a start. Some cooks separate the two muscles for cooking as that gives better control overall. We don’t, because that’s the way we roll. Yet more flavour comes from the delicious bark that forms around the outer layer. To make sure you get the best results, liberally dust your brisket with seasoning such as The General.
You’d be surprised how much salt a brisket can take so don’t be shy with seasoning this cut. We’ve been known to inject the brisket with solutions of beef stock, apple juice, pineapple juice and seasoning to give extra beefy flavour.
The bark will form slowly after smoking for the best part of a day – low and slow, 8 to 14 hours is normal! There is a school of thought that lends to hot and fast too, cooking the beef hot and reducing the time. You could also try rolling the cut in American mustard and then loads of cracked black pepper and sea salt for another tasty option. Now it’s your turn to be the Pitmaster!
For us, the best cook comes from our good old faithful offset stick burner – a horizontal offset cooking chamber, which is designed to cook with natural wood logs or charcoal. We like a mix of oak, cherry and lump wood charcoal, to give it a beautiful smoky flavour and an ability to keep some temperature stability. There are a load of different kinds of smokers on the market these days and you can spend as much as you want!
If you don’t have a stick burner, brisket can also be cooked really well on a regular barbecue, with a combination of wood and charcoal. In both cases, begin by sticking the meat straight on the grill, which will help the meat to infuse smoke and obtain that true, authentic flavour.
The smoke ring develops straight from the outset using wood smoke as the catalyst. It’s actually not a wood smoke ring, but a chemical reaction to do with the reaction of myoglobin and Nitric Oxide and Carbon Monoxide! You won’t get a smoke ring in the oven or with a pellet smoker, nor if you cook the brisket first in the oven then finish it in a smoker.
While cooking, we recommend sitting down with a few beers, for good brisket comes only to those who wait! Smoke your brisket for 4 – 5 hours at around 220-250F, before wrapping it up in tinfoil (called the Texas crutch) and ramping the temperature up to 300F+ to cook for another 4hrs. Depending on size and type of brisket! Smaller UK breeds are much less able to endure heat exposure and do not have the fat content or connective tissue that protects the cook, they need to be treated very delicately. We try and go for Australian or USDA brisket if we can get hold of them as they are, on the whole, more stable, more juicy and larger! If you don’t already have a meat thermometer, get one. Otherwise you’ll have no idea what’s going on inside. You can go all our wireless these days and get an app to watch your brisket for you. Watch out for the stall where the meat stabilises in temperature and tries to sweat it out like a fat bloke in a sauna. This usually happens around 165F and can be a painful process to break through. Wrapping the brisket in peach paper or foil will hasten the process and drive the meat to the target around 210F internal. If you want a harder bark finish, unwrap the brisket before the end of the cook and get some heat exposure onto the rub. When the time comes, your brisket should be deliciously juicy. By this we mean meat juices running like a tap.

Fillet is very tender and lean and is best served straight from the braai with a rich sauce full of flavor.
INGREDIENTS
1 whole fillet steak
salt and pepper
For the sauce:
1 punnet brown mushrooms
1 punnet button mushrooms
1 onion (chopped)
2 garlic cloves (crushed and chopped)
plain cream cheese (1 tub will be enough)
1 cup fresh cream
1 block (about 100g) blue cheese
salt and pepper to taste
METHOD
Heat the oil in your fireproof pan and fry the onion and mushrooms until soft and tender.
Add the garlic and fry for another minute. Now add the cream, cream cheese and blue cheese and let this gently simmer until thick and creamy. Season with salt and pepper if needed.
Remove the steak from the packaging. Rinse well under cold running water and pat dry with kitchen paper towel. Cut the steak into four equal pieces and season well with salt and pepper. You will notice that 1 kg of fillet steak divides into four neat portions of fillet medallions – that’s why I designed the recipe like this, to make it easy for you.
Now you can braai your steak over very hot coals for about 8 to 10 minutes. Make sure you braai the fillets on all sides. A fillet medallion has 4 to 6 sides and all of them need to face the coals at some time.
Serve the steak medallions with your creamy mushroom sauce poured over.
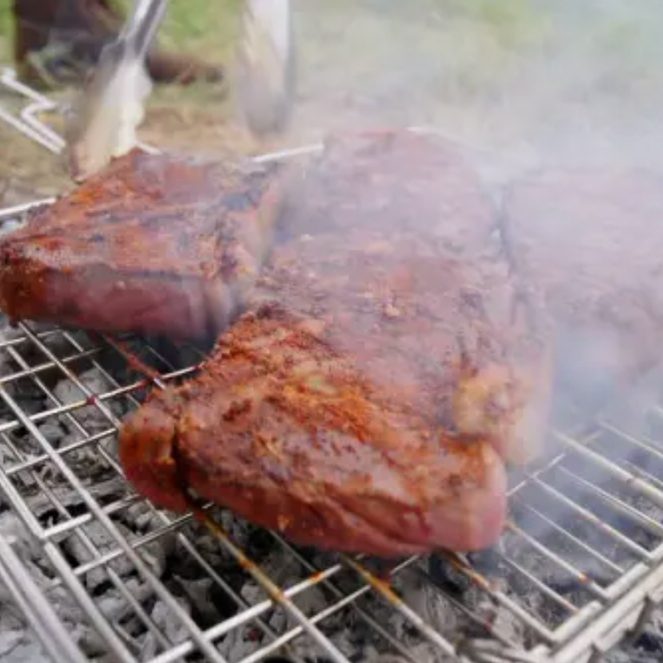
When exposed to the searing heat of a braai fire, ground coffee beans develop a flavor that complements braaied steak really well. Curiously, it actually makes a beef steak taste even more like a beef steak. The ingredients list of the spice mix in this recipe also contains sugar, which helps the spice mix as a whole to caramelize properly. The downside is that sugar burns quite easily on the fire when it is exposed for too long to the high-heat coals you want to braai steak on. You want the sugar to just caramelize and not to over-caramelize, which is a diplomatic phrase for burn! Therefore, braai the steaks until almost done, take them off the fire and toss with the spice mix and then it’s back to the fire for just a few final minutes to finish it off. Feeds 6.
INGREDIENTS
6 sirloin steaks
olive oil or melted butter (for dressing)
FOR THE SPICE MIX
1 tot good-quality ground coffee
1 tot dark-brown sugar
½ tot salt
½ tot ground pepper
½ tot paprika
½ tot ground coriander
1 tsp chili powder
1 tsp mustard powder
1 tsp ground ginger
1 tsp dried oregano
METHOD
Light a massive wood fire.
Now mix all the spice ingredients together. That means everything in the ingredients list of this recipe, except the steak and the olive oil.
Keep the spice mix on the side. This rub will go onto the meat just before the steaks are finished braaing – not yet.
Braai the steaks over hot coals for 5 minutes in total, turning only once. Remove from the braai and generously spice the steaks all over with the spice mix. You can use your clean hands or a spoon to pat and rub the spice into and onto the steaks.
Return the steaks to the fire and braai for no more than 4 minutes, 2 minutes per side until the spices and specifically the sugar start to caramelize.
Remove the steaks from the fire and drizzle with melted butter or olive oil. This gives it a nice shine and adds flavor.
Let the steaks rest for a few minutes. Then carve them into thin strips and serve to your guests.

Six Steps to Preparing the Perfect Roast Beef Dinner
1. Choose Your Meat Carefully
When choosing the best beef to use, look for a thin covering of fat and small slivers of marbling that run through the flesh. Fat prevents the beef from drying out while cooking.
Top Tip: Learn to distinguish between different cuts of beef and how they are best used for roasting.
Rib of beef: This is usually cooked on the bone.
Sirloin: This is usually boned, rolled, and carries less fat than the rib.
Topside, silverside, and top rump: All three are quite lean with less marbling and are usually rolled with an outer layer of fat taken from the flank of the animal and tied together to form a cylinder shape. By the way, for the best rump steak sandwich you’ve ever tasted try this recipe: Steak Sandwich.
Fillet: This is often used for Beef Wellington and contains small slivers of fat that run through the flesh.
2. It’s in the Preparation
Allow the meat to warm up to room temperature before cooking. Drizzle it with a little olive oil and season with Robertsons Black Pepper, rubbing it over the meat with your hands.
Alternatively, gently heat some oil, mix in a Knorr Beef Stock Pot and stir on a low heat until the stock melts. Once melted, set it aside to cool for five minutes, then rub the stock mixture into the beef with your fingers before cooking, for a fuller flavor profile.
Remember, for extra taste, sear the beef in a hot oven for 15 minutes, then reduce the temperature. This creates a nice brown color on the outside of the beef and helps seal in the juices. Another method is to brown the meat in a hot pan on the stove with a dash of oil. Make sure to brown all sides before placing it in the oven.
Top Tip: Baste the beef from time to time during cooking, as this will greatly enhance the flavor.
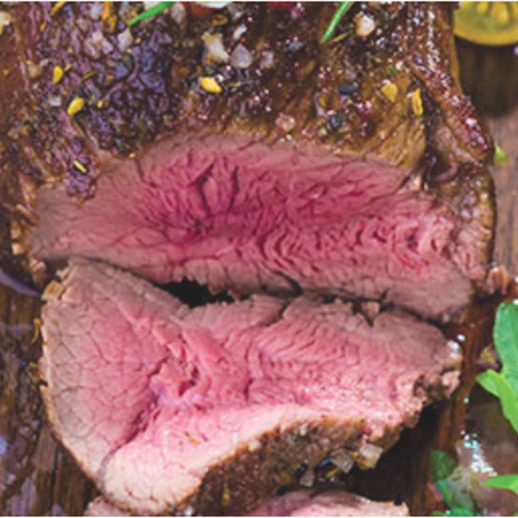
A simple recipe with heaps of flavour.
Ingredients
1kg whole beef fillet
6 tbsps olive oil
8 garlic cloves, finely chopped
2 tbsps fresh rosemary, finely chopped
1 tbsp dried thyme leaves
2 tbsps coarsely ground black pepper
2 tbsps Parmesan, grated
1 tbsp salt
Method
Step 1
Prepare the beef by trimming off excess fat with a sharp knife. Fold thin tip end under to approximate the thickness of the rest of the roast. Tie with butcher’s twine, then keep tying the roast with twine every 2 or 3cm (to help the roast keep its shape). Snip silverskin with scissors to keep roast from bowing during cooking. Then the mix oil, garlic, rosemary, thyme, pepper, Parmesan and salt; rub over the fillet to coat. Set meat aside.
Step 2
Heat the braai or grill and spray the grates with oil. Place the beef on the hot side of the braai or grill and cook until well-seared, about 5 minutes. Turn the meat and cook until well-seared on second side, another 5 minutes.
Step 3
Move the meat to the braai or grills cooler side. Cook until a meat thermometer inserted in the thickest section registers 130°C for rosy pink, 45 to 60 minutes, depending on fillet size and grill. Let the meat rest 15 minutes before carving.

You will need
Brown gravy
2 kg of well matured rolled sirloin
2 T (30 ml) Ina Paarman’s Garlic Pepper Seasoning
olive oil
2 onions, roughly chopped
2 cups (500 ml) water
meat Thermometer – essential equipment
pan with meat drippings and onion
1 wine glass of red wine (optional)
2 cups (500 ml) boiling water
1 x 25 g Ina Paarman’s Liquid Beef Stock
1 T (15 ml) Ina Paarman’s Brown Gravy Powder
2 T (30 ml) cold water
a splash of well-aged balsamic vinegar or a good squeeze of lemon juice
Method
Remove the meat from the fridge and rub with a generous coating of Garlic Pepper Seasoning. Drizzle with olive oil. Cover with cling film and leave to stand at room temperature for 1 hour.
Position oven shelf two slots below the middle position.
Preheat oven to 140°C.
Place cut up onions and water in a roasting pan. Put the meat on a trivet or rack that fits on top of the pan. Insert meat thermometer into the center of the thickest part of the roast.
Roast open for about 1 hour until the temperature on the thermometer reads 60°C (140°F) for rare.
Remove the pan from the oven. Lift off the rack (don’t wash the pan!) and cover the meat snugly with foil. Leave to rest for at least 30 minutes on a wooden board to give the juices time to settle. The meat will stay warm, covered like this for 45 minutes, so don’t panic and rush. It gives you time to make gravy, bake the Mini Yorkshire Puddings with Roast Beef and Caramelized Onions and rev up the roast potatoes.
When serving the meat need not be boiling hot, as long as the gravy is piping hot and the dinner plates are warm.
Brown gravy
Remove the onions with a slotted spoon. Add the wine to the pan drippings. Place pan over high heat on top of the stove and boil vigorously while scraping up the brown bits. The wine needs to be reduced for about 5 minutes. Add the boiling water, squeeze in the sachet of Liquid Beef Stock. Mix the Brown Gravy Powder with the cold water and add. Boil to thicken slightly. Add balsamic vinegar or lemon juice to balance the flavors. Taste for seasoning.

Ingredients
• 1 fat-trimmed, 4-bone beef rib-eye roast (about 3.5 kg)
• 1 tablespoon dried thyme
• 1 1/2 teaspoons kosher or coarse sea salt
• 1 1/2 teaspoons fresh-ground black pepper
• 1 1/4 cups fat-skimmed beef broth
• 1/4 cup brandy or port
Preparation
1. Rinse meat and pat dry. In a small bowl, mix thyme, salt, and pepper. Rub mixture evenly all over roast. Set onto the lower tray, bones down.
2. Roast beef at 180°C for about 2 hours
3. Transfer roast to a platter and let stand in a warm place at least 10 minutes.
4. Meanwhile, skim off and scrape remaining fat and bits from fryer into a saucepan. Add beef broth to pan and stir to. Add brandy. Set pan over high heat and stir until mixture is boiling vigorously. Stir in juices accumulated from roast on platter. Pour sauce through a fine strainer into a small pitcher.
5. Carve roast and serve with sauce.
Note: For easy carving, have the butcher cut the rib-eye muscle from the bones, then tie the meat and bones back together for roasting. After cooking, the roast may stand in a warm place up to 30 minutes. To serve, snip off the string, lift the roast off the bones, and slice the meat. Cut between the bones to serve them.
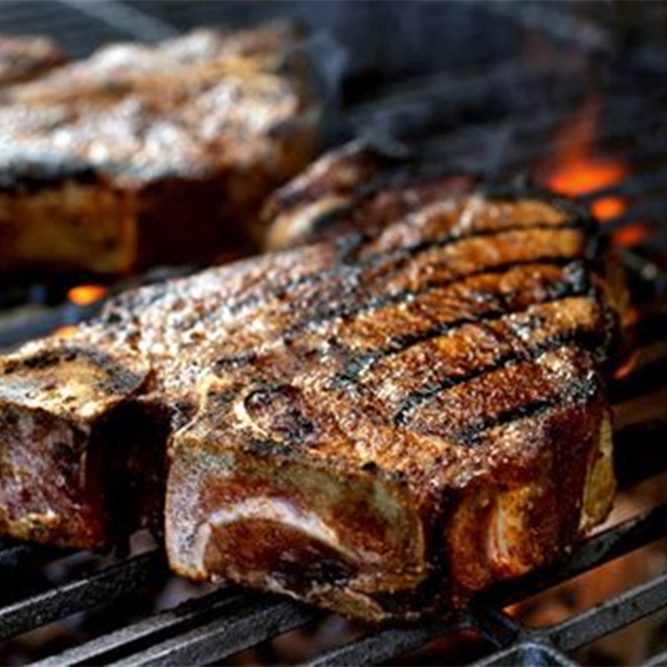
INGREDIENTS
Yield: 4 to 8 servings
4
tablespoons coarse salt
2
tablespoons white or brown sugar (optional)
2
tablespoons coriander seeds
1
tablespoon black peppercorns
1
tablespoon paprika or 2 teaspoons paprika plus 1 teaspoon cayenne
1
tablespoon garlic flakes or powder
1
tablespoon onion powder
1
tablespoon dried thyme
4 to 6
T-bone steaks, about 1½ inches thick
PREPARATION
Step 1
Make the braai spice: In a grinder or mortar and pestle, grind all the seasonings and herbs until fine.
Step 2
Rub steaks with the braai spice and set aside in refrigerator for 1 to 4 hours. Bring to room temperature before grilling.
Step 3
Heat a grill until screaming hot. Place steaks on the grill and cook, turning every 2 minutes or so, until crusty outside and medium-rare inside, 120 to 125 degrees. Let rest 10 minutes and slice across the grain for serving.
